Saturday, December 10, 2011

Winter Wreath

At first I thought this wreath would come out more Christmas-y, which it does, but I think it will work for the entire Winter season. I found the tutorial here: Enchanted Rose Studio. This creator used more circles than I did, but I liked being able to see more of the text of the book than not.

The book I used was a copy of "The Hobbit" that had fallen apart. I knew I was going to use it for something, and when I saw this blog I knew it was the perfect thing to do! Below are pictures of the steps I took in bringing the finished product to life. I highly suggest taking on this project. It was a lot of fun, is very beautiful when completed, and didn't take that much time to complete. Happy crafting!

Step 1: cut strips from the book pages to cover a wreath form - slightly overlap each strip so that the entire form is covered. The back will be where the edges come together.

Step 2: cut out circles (I used a 3 inch circle) from the book pages. Cover the edges in glue and dip in glitter. I believe the tutorial I shared above used glitter glue, but I liked the look of dry glitter better.  Let these dry before you start to apply them to the wreath form.


Step 3: form the circles into the shape you want to have on your wreath. I used some that had 3 points and some that had 4. Instead of concentrating on the shape of each one I was creating, I just scrunched each piece around the pen, and however it came out was how I put it on the wreath.

 Step 4: Flatten the base of your circular piece so it is easier to glue onto your wreath form. Use hot glue to put it in place on your wreath. I started with the inside first, then went around the outside and then filled in the front of the wreath at the end.

Step 5: Continue placing the circles around the sides and front of the wreath until completely filled in. You don't want to cover the back, otherwise it won't lay flat against the door. Then, secure a ribbon or a hanger of your choice to the back and place on your door or anywhere in your home. I thought about putting a ribbon on the wreath, but I'm not sure it would look right. Maybe I'll have an update in the future...


Thursday, November 24, 2011

Happy Thanksgiving!

So, I originally wanted to keep this blog as the place where I would share recipes I created, but these turned out so good I can't keep them to myself. That would just be cruel!

I LOVE making dessert for family get togethers, so when my husband and I were invited to his Aunt Sue's house for Thanksgiving along with 23 other people I jumped at the chance to make all of the desserts. I was told I should probably make enough pumpkin pie for everyone to have a piece, but that I could make whatever else I wanted. The pumpkin pie recipe I used is from Paula Dean, and you can find it here. The pie turns out super creamy and I've never had a problem with the middle falling in or the edges cracking. So please, use this recipe! Alex's Aunt Sue said it was the best pumpkin pie she'd ever had, and she's a great family cook!

The next dessert I made was a lemon cheesecake. I wanted something a little lighter with a bright taste, and this definitely did the trick. This ended up being Alex's grandmother's favorite dessert. It's another Paula Dean recipe and you can find it here. Don't let the "total time" scare you - 6 hours of that is chilling time in the fridge, and 1 hour (ish) of it is baking time. It really only takes about 15 minutes to put everything together - probably less. The lemon curd recipe for the topping is AMAZING! That is what I got the most compliments on. I also added a little bit of powdered sugar to the top just before serving. I tried to do it earlier (a few minutes before the picture was taken), but it all soaked into the lemon curd.

The last dessert I made was a pair of toffee apple pies. I wanted something with a caramel flavor, and I was really looking for a pie with a crumb topping, but I'm really glad I went with this recipe. There is a crumb topping underneath the top pie crust! You can find the recipe here. I used Jonathan apples for the recipe - 6 in each pie and used deep dish pie plates. This pie was my husband's favorite. I nailed the filling, the streusel topping and the sugary crust.

One thing that I did differently on the pie recipes is I used a different crust recipe. I'm sure the one that comes along with the apple pie recipe is to die for, but I have a favorite recipe. You can find the recipe I use here. The name of the recipe is "Perfect Pie Crust" and it really is. I have never had a problem with this crust, whether I'm using it as a double or a single or for little tarts, it's so butter and flaky, I love it. Bonus - it comes together very nicely in my food processor, which is really great since I don't have a stand mixer! I've rolled out the dough after chilling and without chilling it, and it turns out either way. So - if you don't have time to let the pie crust chill, it will still turn out (and it's easier to roll then!) I usually make the recipe, split it in half, wrap each section in plastic wrap, and then let it chill while I make my filling. It really doesn't need any more chilling time than that. So, I hope you guys try these recipes out. They do taste amazing! Happy Thanksgiving and Happy Baking!!!

Saturday, November 12, 2011

Super Mario Quilt #4

Apparently, I have put all of my other craft/sewing projects on hold to work on this Mario quilt. I really like putting it together, but each character is taking a long time. I am probably spending between 5-6 hours on each one. So far I have completely put together two characters - the red mushroom and Mario.

My last post showed what it looks like when you have the 16 blocks stitched together to make a row. Here's a couple pictures of what my two completed characters look like when the rows have been assembled but now sewn all together yet:


(The mushroom rows have been ironed in the picture, the Mario rows have not.)


Sewing all of the squares together to make the rows is what is taking me the longest. (If anyone has any time saving tips, now would be the time to share!!!!) By the time I get to my 24th character square I'm sure I'll be a pro. The other thing I'm running into is that my finished squares - which I thought would measure 16.5'x16.5' are only measuring 15.5'x15.5'. So - I'm losing area somewhere. I think it's in sewing all of the blocks together, that with them being so small it's hard for me to take a true 1/4-inch seam. But - this means the quilt will be a better size when I'm done with it. We only have a queen bed, and the pattern I'm using will be at least a king-size quilt. I just need to consistently keep making these mistakes to keep all of my blocks the same - so, pray that my sewing skills don't get more accurate over time. 

Here's what my two finished squares look like. I haven't "squared" them up yet for when I sew them together to add borders. I want to see how all of my other character squares turn out before I start slicing and dicing and then end up in a real pickle! Up next is the angry sun square!! I'm not sure I'll dedicate many more posts to the creation of the different squares for this quilt. Once I have them all put together I'll do a picture-heavy post of all of them. I'll even put them in the order of how I'm arranging them on the quilt. Then I'll show you how I'm doing borders between the squares and around the whole quilt. :) 

I'm sure that will be at least a month from now, so until then - Happy crafting!

Thursday, November 10, 2011

Super Mario Quilt #3

This post is an update on my progress for the Super Mario Quilt. I now have all of the little squares cut! It took a few nights' worth of time and effort, but well worth it. This picture shows most of the colors for the quilt and all of the tedious cutting. :)

It was10:00 PM by the time I had everything cut. My goal was to get everything cut AND to put together the first character block, but that didn't happen. I did lay out all of the squares so now I have them in order to sew together.


Then, I decided I wasn't too tired to try to sew at least a couple lines together, and maybe I could even get the whole character together. (Wrong!) It was more tedious than I thought to sew together all of the little pieces. You don't really have a chance to use the pedal on the sewing machine because by the time you start you're at the end of the piece! So, it was a time consuming process. I did manage to get 2 rows sewn together. Once I have the rest of the lines together I'll iron everything and then start sewing each row into the character block. The two rows pictured here are the top two on the red mushroom character square. I should be able to put more rows together tomorrow night after work, but I won't guarantee I'll have one whole character completed. If I do - we can all be surprised! :) Happy crafting!

Super Mario Quilt #2

This post is all about the fabric choices I made for the Mario quilt. Besides the 14 different bolts of fabric you see in this picture, I also purchased 9 additional fat quarters of different shades. That is the most color choices I have ever needed for one craft project! I figured out that I needed 23 different colors for this quilt (I could have pulled it off with 21, but once you get to that many colors, what's two more?). Black, white, and light blue are the most prevalent and each of those needed over 2 yards. The other fabrics pretty much were all 1/4 yard or less. That made my time at the cutting counter significantly longer than it usually is, but it makes putting the quilt together so much more fun!

I am cutting out 1 1/2" squares for this quilt so the finished size of each square will be 1". That means each character square will be 16" when completed. When my husband was helping me design the quilt and telling me which characters he wanted on it, I'm pretty sure he had no idea how tedious the project would actually be. For the black fabric, I cut out over 1,800 little black squares. It's mind-numbing work that I can do while I watch TV, so I really don't mind that much. I'm just hoping all of my corners line up! Once I have all of the fabric cut, I'll compose another post so you can see how many squares it is really going to take. I'll try to have one character square put together when I do that post as well.

On an up-side, this project does help me pass the time while my husband is off traveling. He's gone the rest of this week, home for the weekend, and then gone again next week. So that means I have plenty of time to put things together. I was hoping to keep this project a secret from him, so that he'd be surprised when it was all done, but I don't think that's going to happen any more. He asks for an update on the quilt, and if he doesn't see me working on it when he's home he'll wonder what's going on. I hope he'll be surprised with how quickly I can get it done. It's the top stitching that will be the only wrench in the process. I'm not sure what I'm going to do with that yet. I might try to find someone in Madison that I can take it to, otherwise, I might try to do some hand-quilting on my own or see how much I can really put through my little sewing machine. Anyway - until next time. Happy crafting!

Sunday, November 6, 2011

Super Mario Quilt

My husband saw a quilt that was Mario themed and decided that he needed t have one. It's been on the back of my mind for a couple months now. I've been trying to complete some other craft projects before getting knee deep into this quilt. Not to mention I still have my double Irish chain quilt to put together. He would really like to have this quilt as a gift for Christmas, so I'm going to try my hardest to get it worked out.

I have never been good at calculating how much fabric I need of every color, and this quilt I knew would be difficult. I don't want to waste time and money at the fabric store picking things out without knowing how much I need. So, I did a Google search and - voila! - found what I was looking for.

This site was so helpful, I'm sharing it with all of you. Go here if you want to learn how to calculate how much fabric you'll need of each color for your next quilt. I like this because it tells you how to do triangles too! I'm just doing an easy pattern of 1" finished squares, so my math wasn't too complicated. I'll add on more once I drag my husband to the fabric store to approve of color choices picked out. Wish me luck in getting this completed by Christmas Day - only 48 days and some change to go! Happy crafting!

Tuesday, October 11, 2011

Halloween Glasses


I found the coolest looking glasses at St. Vincent de Paul's the other day. I figured I could do something cool with them since they were only $1 each! I saw some tumblers on Etsy that someone had drawn tree branches on with glass paint and then I knew exactly what I was going to do. First I had to clean the glasses and make sure they were completely dry. I purchased a set of CeramCo glass paints from JoAnn Fabrics that came with step-by-step instructions, so this craft was really easy and fun to do.

The first step was to paint the entire outside surface of the glass with a surface conditioner. I guess this prepares the glass to receive the paint. Once that dried, I could start painting right away. I started off with the main "trunk" of the tree and then added on some scraggly glasses. I did this all around the glasses until they were covered to my liking.
Once the paint has dried for an hour, you coat the painted area with the clear sealant from the kit. Once the first coat dries you put on a second coat. I guess this needs to dry for 10 days to set and then you can wash the glasses in the dishwasher or the sink and drink out of them like normal. I like this glass paint because you don't have to bake the glasses in the oven to have them set up. Minus dry time, this project took all of 15 minutes, but was super fun. These will be perfect for my upcoming Halloween party. Happy crafting!

Sunday, September 11, 2011

Double Irish Chain Quilt

I realize I have been on a bit of a craft binge lately. Previously I was all about recipes and food, so I guess I'm trying to make things even. I'm sure I'll have another tasty blog about food sometime soon. I'm bound to make my lasagna for one of these cold nights!

Anyway, I spent about 5 hours at the Wisconsin Quilt Expo with my mother yesterday. All of the quilts there were very well done. I suppose you don't make it to the judging wall/maze unless the preliminary jury thinks it's well done as well. So, I probably don't have a chance in getting mine in that show next year, but it has really inspired me to continue working on my quilt. Here are some pictures of my favorite quilts from the show:

This frog quilt was AMAZING! I'm pretty sure the tag said it was made out of recycled materials where the proceeds went to help save the rain forest. Regardless - even it if was made with un-ecofriendly material, it is sill GORGEOUS! I think this is made from all appliqued and pieced work - something I will probably never try, and definitely not on this scale! I can't believe this only won 3rd place!


Of course I loved the Badger quilt. There were many other Wisconsin themed quilts - from cities to sports, but this one was my favorite. I liked the song lyrics and football chants that were embroidered into it. Embroidery is probably something else I won't really do. I'd need a fancy-dancy sewing machine for that. Maybe someday...


This sunflower quilt was my pick for "Viewers Choice." I loved the detail work with the quilting patterns and also the diamond shapes on the border of the quilt. Apparently this technique is really easy and you just need a special ruler to cut the fabric - I think it's called the double diamond ruler? Sometime soon I'm going to make a tree skirt and a Christmas table runner that uses this technique. I would have bought the special ruler at the quilting show, but apparently every single booth sold out of it about mid-way through the second day. Oh well. That just gives me an excuse to go to a craft store later! :)


So, all of this talk about quilts means I've got to show you a sneak peak of the one I'm working on. Here's the pattern for the pieces and colors I'll be using. The quilt uses black, light and dark green, light and dark blue, and light and dark turquoise. I'm making this for our bed and hopefully I'll have it done for us to use by Christmas - top quilting included.


 Here is the pattern for the quilting that will be on top. I haven't decided if I'm going to hand quilt it or machine quilt it yet. For hand quilting I can at least do that here myself. For machine quilting I would have to find somewhere that would let me use their long arm machine or top quilt it for me. We'll see what actually ends up happening.


And, here's a sneak peak of the top left corner of my quilt. I've got most of the pieces cut out, but I just couldn't resist putting things together to see what it would really look like. I really like the combination of colors and I think it will work well with the dark brown tones we have in our house.

So, I'll keep you posted on how this long-term project goes and any other little things I come up with. Happy crafting!

Saturday, September 10, 2011

Fall Wreath Completed!

My orange slice wreath is finally done!!! I am actually very proud with how it turned out. Here's a picture of how the rest of the orange slices went on. Once all of the slices were on I took the wreath outside and sprayed it with clear, matte, acrylic paint. I'm hoping that will keep it sealed a little bit and deter any bugs from trying to eat it. The oranges slices aren't completely dried out (completely hard) so they are a little tacky. Hopefully this spray will make it last a little longer. I'm still giving this one to my mother-in-law. It will make a nice birthday present for her and give her front door a fall feel.


The paint only took a few minutes to dry since it was really windy outside. I'm glad I used the matte finish instead of glossy. I think if they were all shiny it would have looked like I used fake fruit, and these slices are definitely real! Once the paint was dry I wrapped an orange ribbon with a circle glitter pattern around the wreath. I used the ribbon to cover up any not-so-great-looking orange slices or places that had little white spots showing through. It's still not perfect, but I think it looks better with it wrapped around instead of just as a bow at the top.


Then, I found the spot that I thought looked the worst to put the flower and cinnamon sticks. That way I could really cover them up and instead of people looking at that place because it looked bad, now they'll look at it because that's where the detail is. I just hot-glued the flower and two cinnamon sticks onto the wreath. Then I tied the ribbon in a bow right next to the flower over/around the cinnamon sticks. I had a little more of a ribbon tail on one side that the other. I thought about cutting these to be the same length, but I like it looking a bit lopsided. The detail is off the to side/corner of the wreath anyway, so I kinda like it. You can do whatever you'd like with yours. I tried to put on two flowers, but I just couldn't get the other one to lay right on the wreath, so I canned it. I think it looks pretty good with just the one flower as well. The last thing I did was curl the ribbon tails around my finger so they had some structure instead of just hanging there.

So - my door decor projects are done. If you try this one, I hope you have a blast making it. Just remember to be patient while your orange slices are drying! Happy crafting!

Thursday, September 8, 2011

Halloween Wreath

I know, I know... I am only 2/3 complete with my fall (orange slice) wreath. But, since it is taking me a little longer to complete that one (and since I'm not completely happy with it) I made a Halloween wreath today. I suppose you could keep it up for most of the fall season. I think I'll hang this one up tomorrow - once I get a nail on our front door - and keep it up through Halloween. Then I'll put up the orange slice wreath after that for the Thanksgiving season. I guess that means I'll have to make one for me and one for my mother-in-law after all, but now I'll have some extra time to get them both done!

So, here's what you'll need:
1 Styrofoam wreath form (I used one that was NOT rounded on the edges)
Black ribbon to wrap around the wreath form
Hot glue gun and hot glue sticks
candy corn (I used 1 1/2 large bags but the extra you can always put out to munch on later!)
Ribbon to use to hang the wreath when it's done (or you can use the same black you used underneath)

First, wrap the ribbon around the wreath form in a spiral pattern. I glued the ribbon down each time it wrapped around to the back of the wreath. Since you'll be covering the ribbon with candy, it doesn't matter how well you wrap the ribbon, if it's a little bubbly, or if you can tell where you started and finished.


Once you have your wreath form completely wrapped, then you can start gluing on the candy corn. I started on the front of the wreath on the row that goes along the outer perimeter, or the top row for the front. Once you've gone all the way around, you're ready to start your second row. The candy corn should be pointed in the opposite direction from your first row. This allows you to fit on more candy and have less black ribbon showing through. Here's a picture of the pattern it makes.


Keep going around the wreath form until you've covered the front, outer edge and inner edge. Then flip it over and cover the back side. You'll still be able to see black ribbon in between your candy corn, but I think that makes it look even better. You could really use whatever color of ribbon you'd like. I think black makes it look nice and sharp. Here's a picture with the front and outer edge being completed:


When you're all finished gluing on the candy corn, you're ready to add your hanging ribbon. I just looped mine around once and then tied it off a few inches at the top. I haven't glued it on yet, but I'm not sure I like the purple bat ribbon. It definitely gives it more of a Halloween flair, but I think I might want to change it to use the same black ribbon I had underneath. I think that might make it look more cohesive, albeit it will make it much less "halloweeny."

Anyway, I had fun making this wreath. It only took a couple hours to make. I easily crafted this during the first regular-season Packer game. (They won - Yay, go Pack!) So, if you try this one out: Happy crafting! :)

Monday, September 5, 2011

Fall Wreath Day 2

So, I'm still working on the fall, orange slice wreath. I initially started with 5 sliced oranges, but soon learned that I was going to need many, many, many more. Total count that I think I'll use is 15, but I'm drying a couple extra right now just to be safe. Currently my dehydrator is on it's third batch of oranges, so it's definitely getting a work out this weekend!

Here's a picture of the supplies I'm using:


Those were about half of my first batch of oranges - the thinner slices that dried faster. My second batch of oranges were a little thicker and took about 8.5 hours to dry. My third batch I'm trying to make a little thinner. They are larger oranges, but I think they'll give the wreath a nice finish.

Here's what it looked like after I had given the wreath form it's first "coat":


I decided not to use the ribbon to cover the form. Looking back, maybe I should have, but I only have one roll of ribbon and it wasn't going to cover the whole thing. I didn't want to run all the way out to Hobby Lobby to get another roll of the same type. So, I'm planning on winding it around the outside of the oranges (if I need to cover some bare white spots at all) once the whole thing is covered to my liking. Then I'll eventually wind it around to the place where I'll put the bow. 

Here's how the wreath looks right now:


I have the front and inside pretty well covered. The back and outside edge still need some work. Once the small white gaps are covered then I'll go back around the front and see where I should put some extra oranges just to make it look nicer. Hopefully my next set of oranges will be dried around 9:00 tonight and I'll be able to finish the wreath this evening. I know my original plan was to make two - one for me and one for my mother-in-law - but I'm not sure I'll want to do the whole thing again. Maybe I'll make myself a nice ribbon-covered wreath with some faux fruit, twigs and cinnamon sticks attached instead. Anyway - if you try this project, learn from my mistakes! :) Happy crafting!

Sunday, September 4, 2011

Fall Wreath


I saw this wreath in a holiday magazine last year and I've wanted to make it ever since. I guess it was hung at a little Chateau (You can see the blog for all the different wreaths featured at the Chateau here: Le Petit Chateau Blog Post).

I just got a new Nesco dehydrator specifically for this project. So far the orange slices have been in the machine for about a 1/2 hour and I can already see a difference in the top shelf. I used a mandolin to cut most of the slices to the same size. But, when I had 2 oranges left to slice, I couldn't get the mandolin to work properly any more. So, I had to cut the rest by hand which means they won't all be uniform. I guess this also means that they won't dry at the same rate as the other slices, but I think it will make my wreath look more unique since I'll have some thin slices and some thicker, more chunky ones too. I cut up 5 navel oranges - we'll see if that's enough or if I'll need more...


Once my orange slices are dried, I'm going to spray them with matte, clear acrylic paint to seal them. Then I'll be hot-gluing them around a Styrofoam wreath form I bought at Hobby Lobby. I'm not really sure the best way to cover the form, so I'm just going to wing it and I'll let you know how it turns out. I'm thinking I might cover it with the orange ribbon I bought and then glue the oranges to that. I don't have any evergreen boughs laying around, so I'm going to use some cinnamon sticks, a nylon flower and some pretty orange ribbon for the accent decoration at the top.
I'm really looking forward to hanging this on the front door of our apartment. I think it will be a nice, fall-themed wreath that will add a little color and a little fragrance to our building's hallway. Once I try it out, my mother-in-law would also like one for her door. Her birthday is coming up in a couple of weeks, so this will make a great present. I am super excited to begin the project, so I'll post more once I get it all going! Happy crafting!

Monday, February 7, 2011

Spicy Barbecue Peanuts

I made these peanuts for my husband a few years ago and they've been a requested treat ever since. Usually I just make regular barbecue peanuts, but lately we've been eating spicy foods. This time I decided to make one of our favorite treats with some extra kick. They were the perfect munchie for our Super Bowl party. Happy cooking!


Spicy Barbecue Peanuts


Ingredients:
1 jar dry roasted peanuts
1/3 cup barbecue sauce - any flavor
1 tsp garlic salt
1 tsp cayenne pepper
1 tsp chili powder
1 tsp  black pepper


Directions:

1)      Preheat oven to 350 degrees F. Pour barbecue sauce over peanuts in a medium-sized bowl. Mix until the peanuts are lightly coated. 
2)     Spread peanuts out onto a greased baking sheet.
3)     In a small dish, combine dry spices. Sprinkle over the peanuts on the baking sheet.
4)     Bake for 15 minutes, turning once half-way through. Allow the peanuts to cool thoroughly and then place in a serving dish or back into their original jar.

Thursday, February 3, 2011

D.I.Y. Wedding Favors

I love to do things myself. So, when it came to planning my wedding I wanted to make all the decorations, the invitations, the favors - anything that allowed me to use my creativity to design my wedding the way my now-husband and I wanted. These wedding favors were probably the easiest things that I put together.

I figured that the people coming to my wedding didn't need a $2 wine bottle stopper or a mini-picture frame that they would never use. I knew they definitely didn't want a candle that had my wedding date and my name written all over it either. So, I decided that everyone pretty much likes candy, and if they don't, the person sitting next to them probably does.

There were many options that I looked at doing. I could have ordered special candies from my childhood for each person. Slowpokes were always my favorite. I could have ordered monogrammed M&Ms with our names or hearts or the date of our wedding - pretty much anything I wanted to put on them. Or, I could have ordered hand-made chocolates that came individually boxed for each guest. All of those options were just too expensive for our budget, so I decided to put together my own wedding favors.

My mother-in-law found clear cellophane bags with a black and white floral design on them at a party store. We filled the bags with a handful of candies that matched our color scheme of black, red, and white. We used Hershey's kisses wrapped in silver, red and white peppermints, and cherry chewy candies. We had 175 guests at our wedding and I spent well under $1 for each favor. We bought the candy in bulk and the bags were the most expensive part. What I like about these favors is that they would match any wedding design. Even if you used clear bags and only put in one type of candy, there's usually something you can find that will match your decor. You could even use them as a pop of color on the tables at every place setting.

We tied red and white curling ribbon around the bags just above the top level of the candy to bring everything all together. We didn't even have to buy the ribbon because we had some with our Christmas wrapping paper. We curled the ribbon with a scissors and then I cut off the tops of the bags so that there would be less of the extra bag material at the top. This way they became a little more stout and not so tall. I love this project because we could fill these with as much or as little candy as we wanted and they looked great and matched our decor. If you're looking for an affordable and adorable wedding favor, I highly suggest these little candy bags.  Happy crafting!

Wednesday, February 2, 2011

Spiced Vanilla Brandy Cake with Cream Cheese Frosting

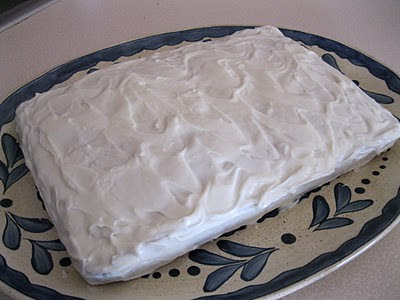
Last night we got 10 inches of snow here in Madison, Wisconsin. Other cities in the state were dumped on with over 2 feet of snow. I didn't much feel like going outside on this blustery day, so I stayed inside and made a new cake. I just played around with my ingredients and made the following spiced vanilla brandy cake. It turned out nice and moist with a seasonal hint of cinnamon - sort of a mesh between a traditional white cake and a coffee cake. Just what I needed for the cold day. I frosted it with my own cream cheese frosting and it really hit the spot. I hope you enjoy it too! Happy baking!

Spiced Vanilla Brandy Cake

Ingredients:
2 ½ cups flour
1 ½ teaspoons baking powder
½ teaspoon salt
½ teaspoon cinnamon
1 cup unsalted butter, softened
1 cup confectioner’s sugar
1 cup packed brown sugar
3 large eggs
¼ cup vegetable oil
3 tablespoons vanilla extract
4 tablespoons brandy
¾ cup boiling water

Directions:
1)      In a small bowl, sift together flour, baking powder, cinnamon, and salt.
2)      In a large bowl, cream butter and sugars together. Add eggs one at a time, beating well after adding each egg. Add the oil, vanilla, and brandy and mix together.
3)      Gradually add the flour mixture to the butter mixture until just combined.
4)      Add the boiling water and combine until evenly moistened.
5)      Pour into greased 9 x 13 inch pan, or two 8 inch rounds. Bake at 350 degrees F for 30 to 35 minutes for 9 x 13 or 20 to 25 minutes for rounds, or until a toothpick comes out clean.
6)      Leave in pan for 10 minutes to cool, then transfer to a wire rack to cool completely. Transfer to a cake plate or platter for frosting.

Ooey Gooey Cream Cheese Frosting

Ingredients:
1 8 oz package cream cheese, softened
1 ¾ cups powdered sugar
1 teaspoon vanilla
2-3 tablespoons milk or cream

Directions:
1)      Place cream cheese, powdered sugar, and vanilla in a small mixing bowl and blend together until just combined.
2)      Add milk one tablespoon at a time. Beat until the mixture is creamy and has reached your desired thickness.
3)      Spread a thin layer of frosting over the top of the cake, then frost up the sides. Spread any remaining frosting on the top of the cake.

Tip: For two 8 inch round cakes, use apple pie filling to fuse the rounds together.

Tuesday, February 1, 2011

Pancakes for Two

My mom used to make my brother, sister, and I chocolate chip pancakes almost every Sunday after church. They were always fluffy and sweet and something I looked forward to every weekend. I've scaled down the recipe below to make enough pancakes for two people, but feel free to multiply it to make as many as you need. These pancakes are a quick and easy treat that I can make for a "breakfast in bed" for my husband or for a tasty start to any day. I hope you enjoy them as much as I do!

Happy baking!

Pancakes for Two

Ingredients:
1 1/4 cup flour
1/3 cup sugar
1 teaspoon baking powder
1 egg
1 tablespoon vegetable oil
1 tablespoon vanilla
Milk to moisten

Directions:
1)      Combine flour, sugar, and baking powder in medium bowl.
2)      Add egg, vegetable oil, and vanilla. Stir together with a fork to roughly bring together.
3)      Add a few tablespoons of milk to moisten the batter. Mix everything together until it loosely comes together. Lumps in the batter are normal and can be left alone.
4)      On an electric griddle (or stove top skillet) heat surface area to 310 degrees F (or medium-high heat). Pour batter onto the griddle and cook each pancake 1-2 on each side. Makes 6 medium-sized pancakes.

Tip 1: For flavored pancakes, chop up your favorite fruit and add to the batter before pouring onto the griddle. For chocolate chip pancakes, add chocolate chips to the pancake after it has been poured onto the griddle and before you have flipped it over to cook on the second side.

Tip 2: For a doubled recipe, use only 1 egg. Tripled or quadrupled: use 2 eggs - so on and so forth.

Monday, January 31, 2011

Sausage and Roasted Garlic Pasta

My husband and I fell in love with a recipe similar to this at our favorite Italian restaurant. But, with 12 inch snow falls predicted for the next couple of days, I decided we should stay in and I'd try to recreate our favorite meal at home. I think it turned out pretty close to the real thing. My local grocery store didn't have any broccoli rabe, so I substituted mushrooms for it in the recipe. My husband likes mushrooms better anyway. I hope you try out the recipe and tweak it to your liking. Let me know what works well for you!

Happy cooking!

*recipe updated 4/29/12*

Sausage and Roasted Garlic Pasta

Ingredients:
1 large head garlic
4 tablespoons butter plus 1 tablespoon
3 tablespoons flour
1 can chicken broth
3 cups cream or half and half
1 1/2 tablespoons brandy
Salt and pepper to taste
1 tablespoon olive oil
Italian (or other seasoned) sausage, cut into slices
½ cup diced onions
2 cups sliced mushrooms or 2 cups broccoli rabe
12 ounces cooked medium-sized shell pasta

Directions:
1)        Separate garlic cloves, peel and roast in oven at 350 degrees F for 30 minutes. 
2)        Melt 4 tablespoons butter in a medium saucepan.
3)        Meanwhile, mush garlic cloves into a paste. Once butter has melted, add garlic to the saucepan and   whisk together for 30 seconds.
4)    Add flour and stir for 1-2 minutes until fully incorporated with the butter and garlic.
5)        Add chicken broth and cream to the butter, garlic and flour mixture. Add brandy. Cook on medium-high heat until reduced and thickened. Add salt and pepper to taste.
6)        Meanwhile, in a large skillet, melt 1 tablespoon butter with 1 tablespoon olive oil.
7)        Once butter has melted, add onions and sausage. Sautee until onions are translucent.
8)        Add mushrooms and/or broccoli rabe to the sausage and onion mixture. Cook on medium-high heat until mushrooms are lightly browned and tender (about 1 to 2 minutes) or until broccoli rabe resembles cooked spinach.
9)        Add pasta shells to sausage mixture.
10)    Once sauce has thickened to your liking, pour over pasta mixture. Let settle 1-2 minutes. Top with freshly grated parmesan cheese and serve. Makes 4-6 servings.
Related Posts Plugin for WordPress, Blogger...